


Thailand Bans Recreational Cannabis Sales, Prescription Now Required
Thailand bans cannabis sales without prescription to stop abuse and refocus on medical use under stricter health supervision. Thailand bans cannabis sales without prescription in a sharp policy shift meant to reduce abuse and protect public health. The government made this move after noticing a surge in unregulated cannabis use, especially among youths and tourists.
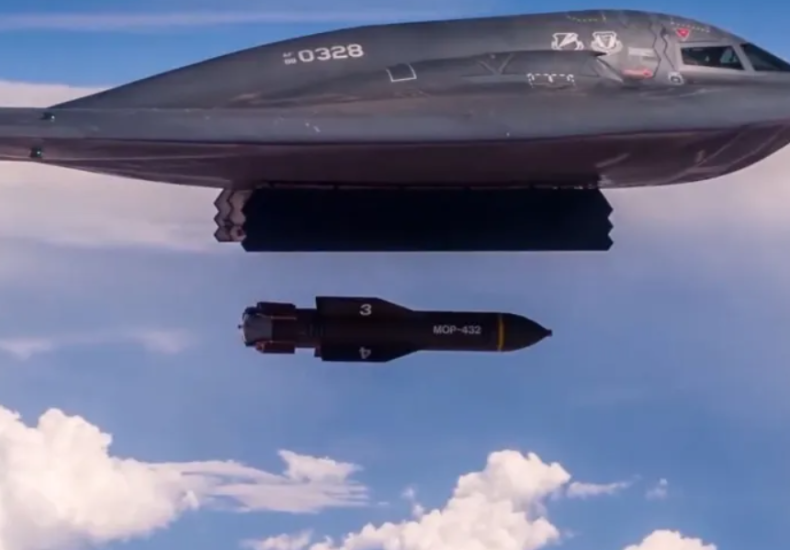
US Fails to Disable Iran’s Nuclear Facilities in Airstrike
US airstrike fails to destroy Iran’s nuclear facilities, raising questions about American military precision and strategy. The recent US airstrike targeting Iran’s nuclear facilities ended in failure, as key infrastructure remained intact. The strike, intended to cripple Tehran’s nuclear capability, missed its strategic objectives. This raises serious doubts about the effectiveness and accuracy of the

XRP Surges 10% Backed by Strong Crypto Market Sentiment
XRP price jumps 10% as positive crypto sentiment dominates and investor confidence rises across the market. XRP price jumps 10% in the last 24 hours, signaling a sharp move fueled by a wave of optimism in the crypto market. This price rally comes as investor confidence rebounds following weeks of price consolidation for XRP. Market

U.S. Joins Forces with Israel in Military Action Against Iran
US backs Israel against Iran, escalating military tensions in the Middle East and shifting global geopolitical dynamics. U.S. Joins Forces with Israel in Military Action Against Iran Tensions in the Middle East have reached a new high as the US backs Israel against Iran in an open military collaboration. This marks a major shift from
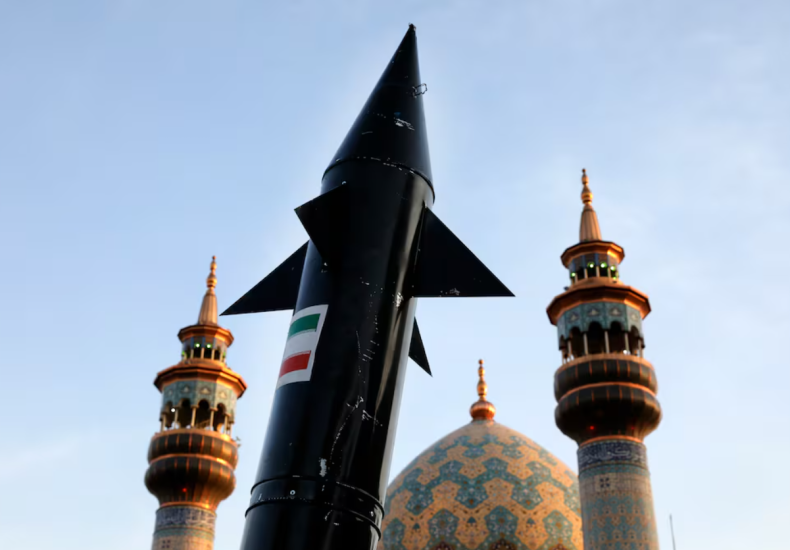
Iran Claims It Repelled Israeli Strike Targeting Its Nuclear Sites
Iran says it successfully repelled an Israeli strike aimed at its nuclear site, showcasing its military defense capabilities. Iran foils Israeli strike—this headline gained global attention after Tehran announced it had repelled a recent attack on one of its nuclear sites. The government claimed its defense systems blocked the strike, which targeted the Natanz nuclear

Trump Rejects Putin’s Mediation Offer on Israel-Iran, Urges End to Ukraine War First
Trump rejects Putin mediation on Israel-Iran, says Russia must end Ukraine war before acting as a peace broker. Calls for End to Ukraine War First Trump rejects Putin mediation in the ongoing Israel-Iran tensions, insisting that Russia must stop its war in Ukraine before trying to act as a peace broker. The former U.S. President’s
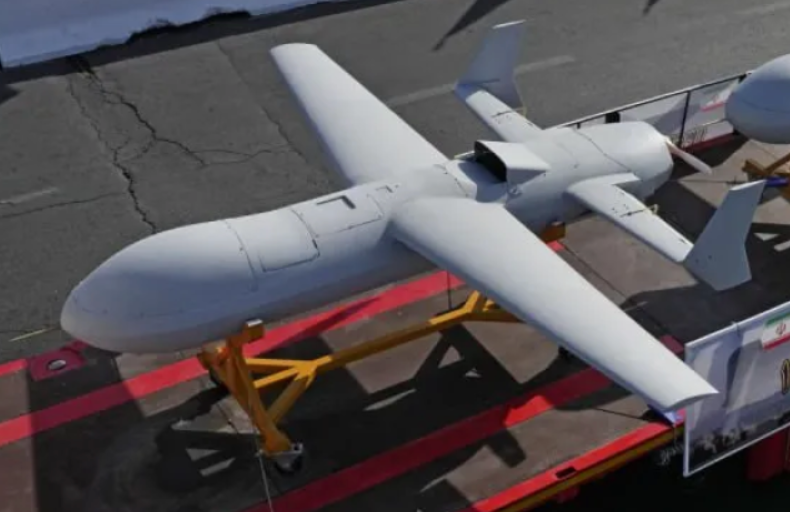
Iran Unveils Long-Range Kamikaze Drone Capable of Flying Over 1,500 Km
Iran’s latest kamikaze drone flies over 1,500 km, raising global concerns over rising military threats in the Middle East. A New Threat from the Sky Iran has introduced Iran’s latest kamikaze , capable of flying more than 1,500 kilometers. This new drone adds serious firepower to Iran’s arsenal and increases global concern over rising tensions

XRP Price Spikes Amid SEC Settlement Hopes and Bullish Signal
XRP price surges on SEC settlement optimism and bullish chart signals, boosting investor confidence in Ripple’s recovery prospects. The XRP price is making headlines today after a notable surge that has caught the attention of both retail and institutional investors. Two main catalysts are fueling this rally: renewed optimism around a potential settlement with the

Iran Launches Cyberattack Amid Escalating Conflict with Israel
Iran launches cyberattack on Israel as war intensifies, signaling a new digital front in the growing conflict between the two nations. The conflict between Iran and Israel has taken a new and dangerous turn, as Iran reportedly launched a cyberattack on Israel amidst the escalating military tensions. This marks a significant shift in the nature

AI in the Film Industry: Creative Tool or Threat to Filmmakers?
AI in the film industry boosts efficiency, but raises concerns over the creative role and future of traditional filmmakers. The use of AI in the film industry has sparked growing debate among creators and professionals. While the technology brings significant improvements in efficiency and productivity, it also raises concerns about the potential replacement of human